![]()
How To: Install and Configure ejabberd on CentOS
ejabberd is XMPP server software which can be used for instant messaging on your own server. In this tutorial, you will be able to learn how to properly install and configure ejabberd on CentOS.
With that, let’s get started.
Preparation
First, start by opening ports 5222 and 5280 (TCP). Port 5222 is for XMPP traffic without SSL and port 5280 is used for ejabberd’s web interface. If you’d like, you can also open port 5223 for XMPP traffic with SSL.
An example:

Step 1: Download & Install
ejabberd isn’t available in the main repositories, so it’s necessary to enable the EPEL (Extra Packages for Enterprise Linux) repository. This can easily be done by downloading and installing these RPMs for the respective CentOS release you are running:
EPEL for CentOS 5 (i386, x86_64)
EPEL for CentOS 6 (i386, x86_64)
After that, run:
yum install ejabberd
Step 2: Configure
Open up the ejabberd configuration file in your preferred text editor:
/etc/ejabberd/ejabberd.cfg
In the config file, locate the following:
{hosts, ["localhost"]}.
Modify this line to represent the correct host name. Example:
{hosts, ["localhost","example.net"]}.
Next, locate the section for admin users in the access control lists part of the config file. You should notice something similar to this:
XMPP: The Definitive Guide: Building Real-Time Applications with Jabber Technologies
{acl, admin, {user, "username", "localhost"}}.
Edit this so “username” is whatever you want your admin username to be, and replace “localhost” with the correct hostname for the server.
Save the configuration file and start the ejabberd daemon with:
/etc/init.d/ejabberd start
To create the admin user, run:
ejabberdctl register admin localhost password
Substituting “admin” for the username you created earlier, “localhost” for your correct server hostname, and “password” for whatever you want your password to be.
Practical Guide to Linux Commands, Editors, and Shell Programming, A (2nd Edition)
If all went well, you can now access the web interface for ejabberd by browsing over to http://yourhostname:5280/admin. Type in your username and password when prompted. You should see something similar to the following:
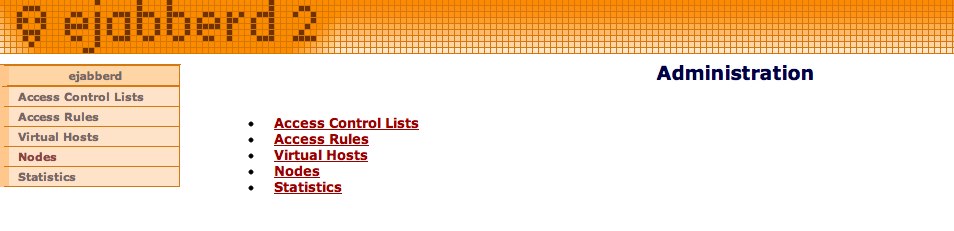
Step 3: Connect to the ejabberd Server
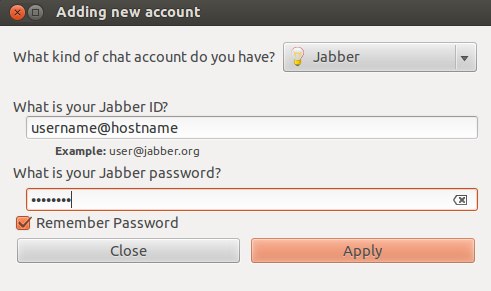
It should now be possible to connect to your ejabberd server from an IM client that supports XMPP. We”ll try connecting using Empathy, but another client like Pidgin should work just as well.
Select Jabber as the account type, and then type in the username you created earlier along with the hostname (example: username@hostname). Finally, enter the password for the account.
Additional Accounts
You might want to create some more accounts for your friends or other computers in your network on the server. The best way to do this is by running ejabberdctl for each individual account you want to create.
ejabberdctl register newuser localhost password
Additional Admin Accounts
To create an additional admin account, open the ejabberd.cfg file and locate:
{acl, admin, {user, “”, “localhost”}}.
Create a new line under this and add:
{acl, admin, {user, “”, “localhost”}}
Add your new username between the quotes and provide your hostname, replacing “localhost”. Finally, run ejabberdctl as shown in Step 2 for creating the admin account.
This tutorial was last updated on August 5th, 2013.
About LinuxSnap
Welcome to LinuxSnap.com! LinuxSnap aims to become the best source for brief and informative Linux news. Each day you’ll find information including the latest Linux headlines, distro releases, apps, and more.